Mastering the Perfect Light Setup for Headshots
A fantastic headshot has very little to do with expensive gear. It’s all about understanding how to control light and shadow to bring out the best in someone's face. Honestly, the most powerful portraits I’ve ever seen come from a deep knowledge of how light works, not from the brand of camera in the photographer's hand. Once you get a handle on these principles, you can create truly professional images with just the basics.
Why Lighting Is Your Most Powerful Tool for Headshots
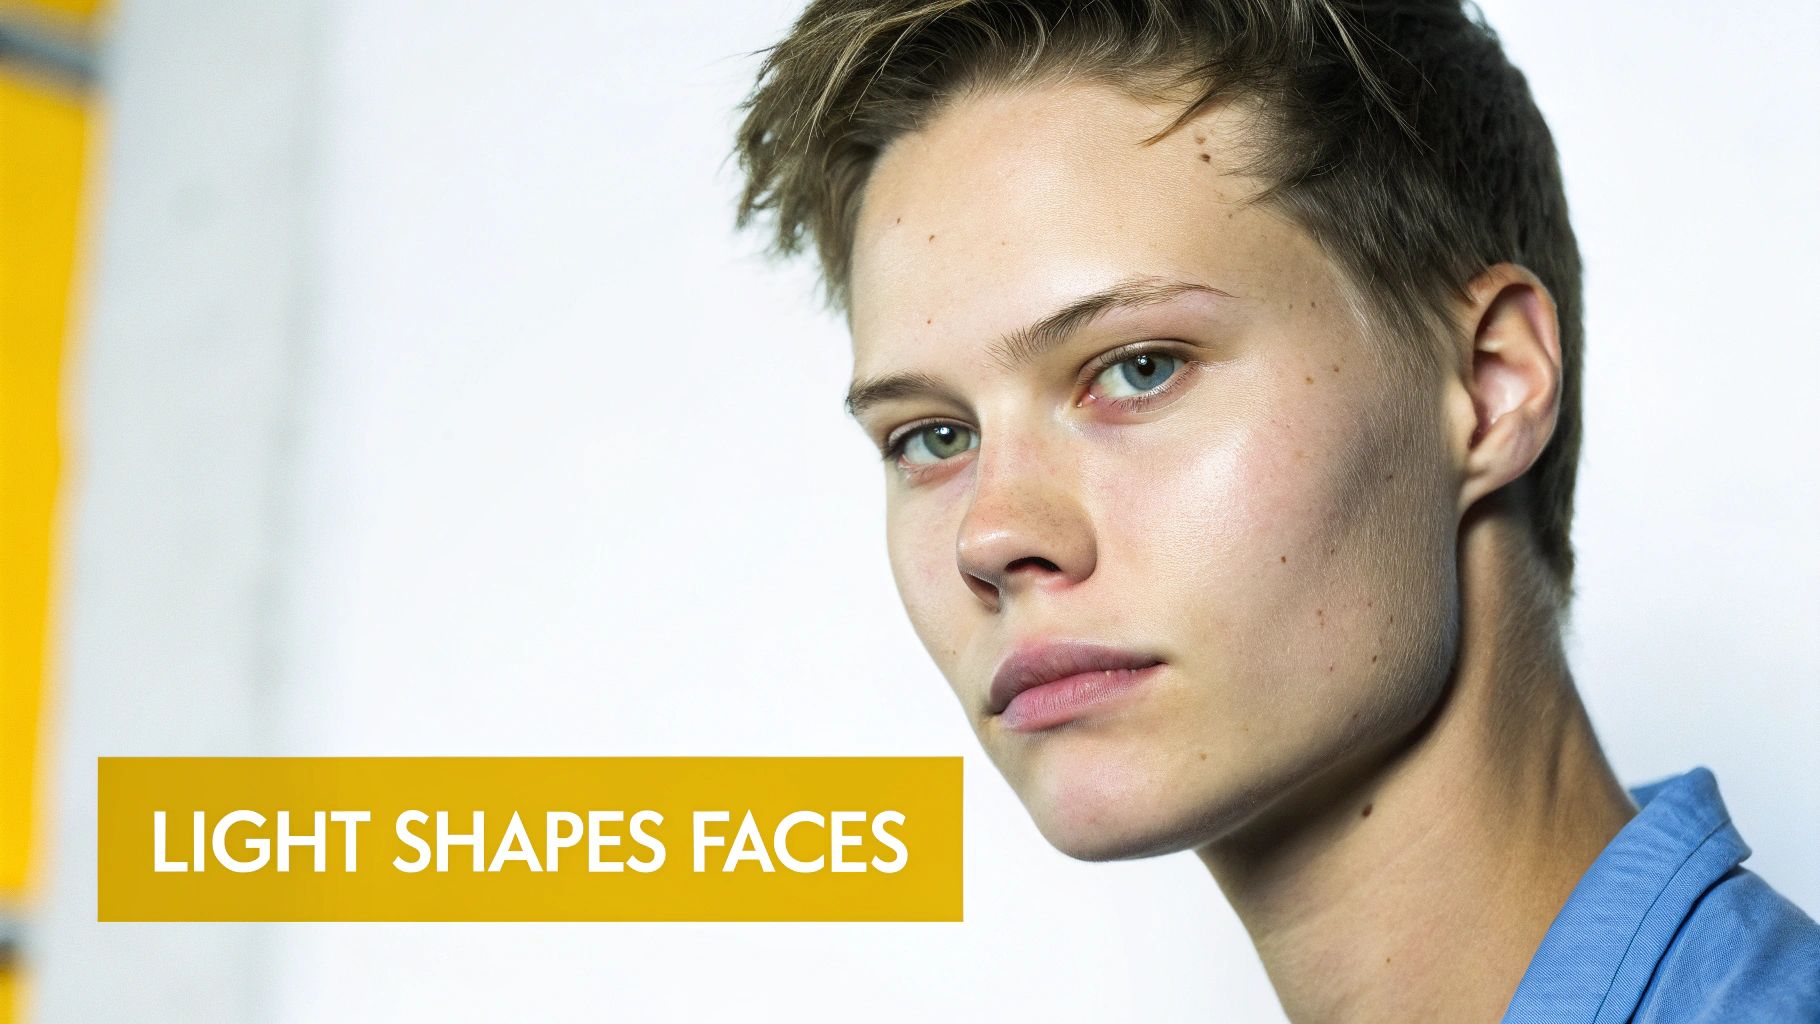
It’s a persistent myth that a high-end camera is the secret to a great headshot. While a good camera certainly doesn't hurt, the real game-changer is your lighting. Light is the single most crucial element in photography—it sets the mood, carves out dimension, and defines the very features of your subject. Without considered lighting, even a top-of-the-line camera will just give you a flat, uninspired picture.
The core idea is pretty simple: light sculpts. Where you place your light source dictates where the shadows fall, and it’s those shadows that give a face its structure and depth. A light positioned high and to the side will create entirely different contours than one placed dead-on in front of the subject.
Key Takeaway: Your light setup matters more than your camera. Getting good at controlling light is the fastest way to level up your headshots from simple snapshots to professional portraits that grab attention and show real personality.
The Role of Light in Shaping Perception
The way you light someone has a direct impact on how they come across in the final image. A soft, broad light source can create a friendly and approachable vibe, which is perfect for something like a corporate LinkedIn profile. On the flip side, a hard, directional light can produce stark, dramatic shadows, creating a sense of power or intensity you might want for an actor or an artist.
Grasping this relationship is fundamental. Before you even think about picking up your camera, you should be asking what this headshot needs to communicate. That goal will drive every single decision you make about your light setup for headshots.
Think about what lighting really does for you:
- Depth and Dimension: Good lighting pulls your subject away from the background and defines their facial features, saving you from that flat "passport photo" look.
- Mood and Tone: The quality of your light (hard vs. soft) and its direction are what set the emotional tone of the entire portrait.
- Flattering Features: You can use light strategically to accentuate cheekbones, sharpen a jawline, and add that all-important sparkle to the eyes, which we call a catchlight.
Ultimately, learning to see and shape light is the foundational skill that unlocks all your creative potential. The setups we’re about to go through aren't just technical recipes; they're your tools for crafting emotion and telling a story with light.
The Classic One Light Setup for Impactful Portraits
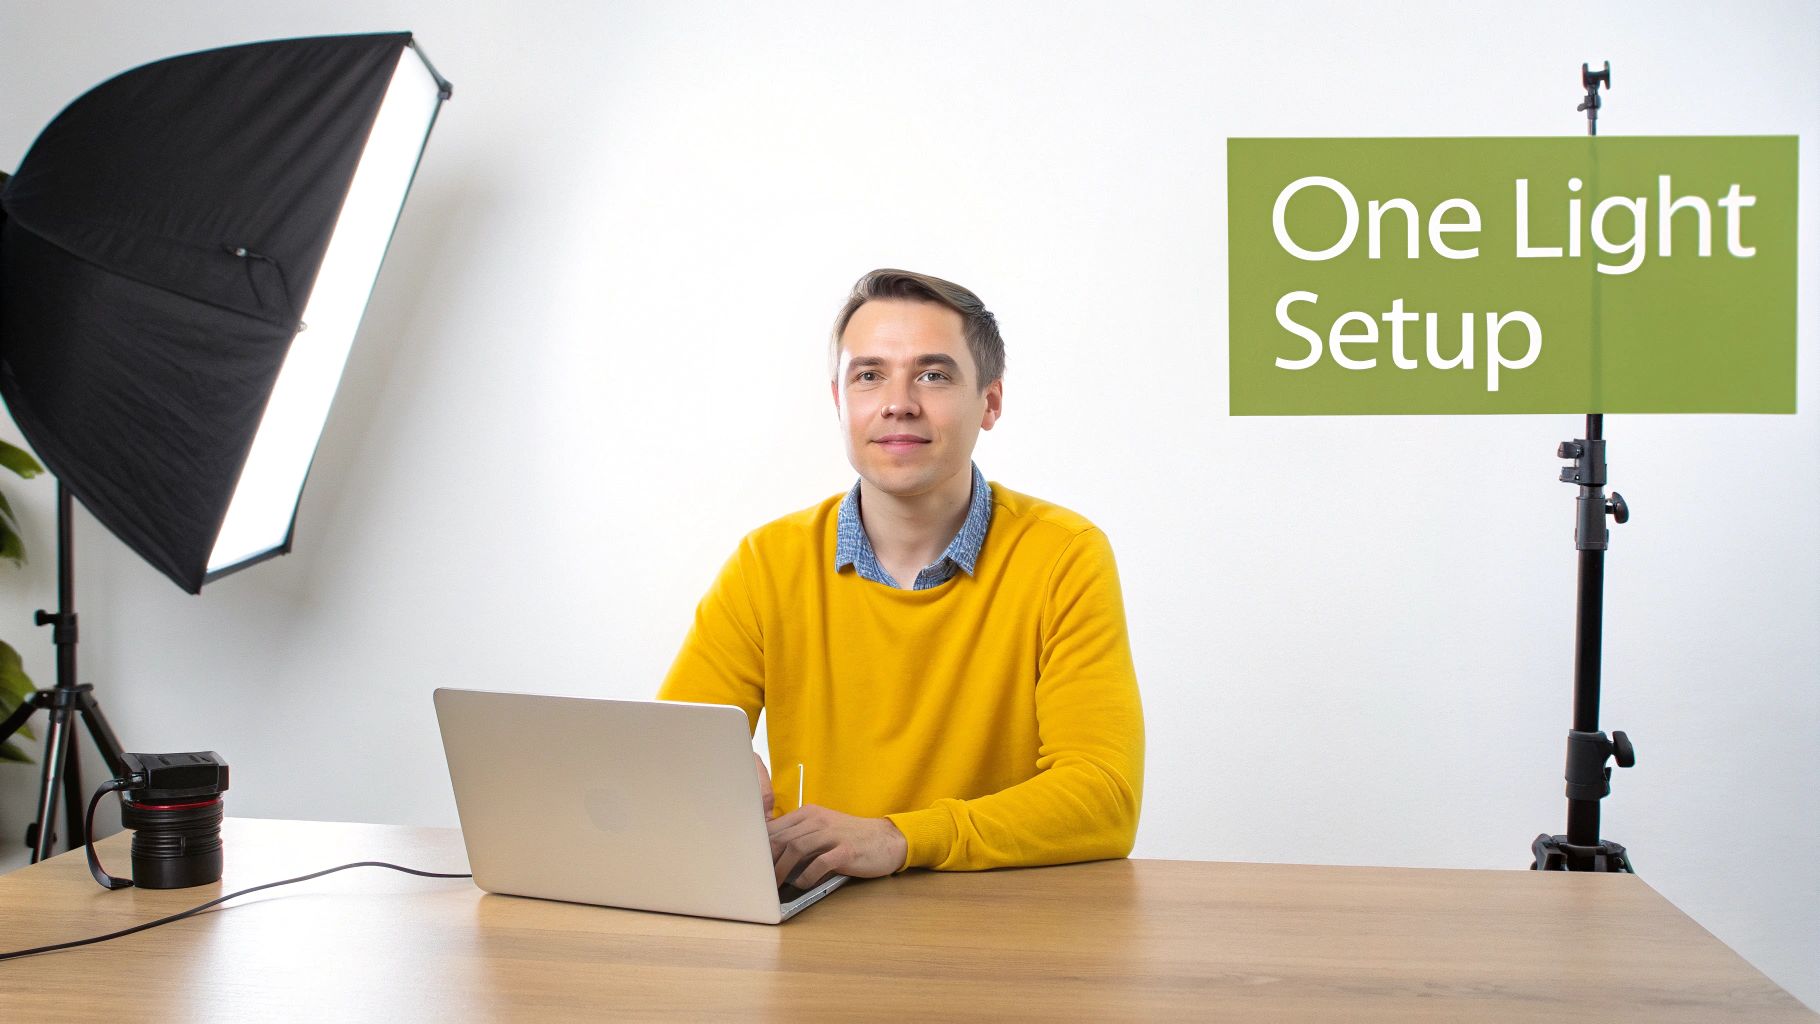
You absolutely do not need a studio packed with gear to create stunning headshots. Truth be told, a single, well-placed light is often all it takes to produce professional, high-impact portraits that will get your clients noticed.
This isn’t just a beginner’s trick, either. The "one-light wonder" is a go-to for seasoned photographers who value simplicity, speed, and precise control. It’s a workhorse for a reason.
In fact, it’s so effective that it dominates entry-level professional work, showing up in an estimated 60% of shoots by freelancers across the US and Europe. You can see just how prevalent it is in this Digital Photography School analysis of 1,000 portfolios.
Choosing Your Light and Modifier
The foundation of any great light setup for headshots comes down to the quality of the light itself. With a single-light approach, your goal is soft, flattering light, which means you’ll need a solid modifier to diffuse the source.
- Softbox: This is the most popular choice, and for good reason. An octagonal softbox (often called an "octabox") creates a beautiful, round catchlight in your subject's eyes, which looks far more natural than a square. For individuals, a 36-inch or larger softbox will give you a broad, wrapping light that’s incredibly forgiving.
- Umbrella: A shoot-through or reflective umbrella is another fantastic option. They’re super portable and create a very soft, widespread light. The trade-off is that they offer slightly less control over light spill compared to a softbox, so you might get more bounce around the room.
As for the light source, you can use either a strobe (flash) or a continuous LED. Strobes pack more punch, which is great for overpowering ambient light and freezing motion. Continuous lights, on the other hand, let you see exactly how the light is falling on your subject in real-time—what you see is what you get.
Positioning for Classic Lighting Patterns
The real magic of the one-light setup is all in the positioning. Just by moving your light a few feet, you can create entirely different moods and styles without adding any more gear.
Let's say you're shooting a powerful LinkedIn headshot for a client in their home office. A great starting point is to place your main light (your "key light") at roughly a 45-degree angle to them. You'll also want it positioned slightly above their eye level, angled down. This is your foundation.
From this single position, you can achieve several iconic lighting patterns simply by making minor adjustments. Your goal is to create shape and dimension by controlling precisely where the shadows fall.
With your light in this core position, try asking your subject to turn their head slightly away from the light source. This creates what’s known as a "short lighting" pattern, where the side of the face turned away from the camera is more brightly lit. It's a classic, slimming technique that instantly adds depth and contour.
Using a Reflector as Your Secret Weapon
A single light doesn't mean you can only have one source of illumination. A simple reflector, held on the opposite side of your key light, can bounce light back into the shadows. This softens them up, creating a more open and approachable feel. You don't need anything fancy; a plain white foam board from a craft store works perfectly.
For a more dramatic or masculine look, you can do the opposite. Use the black side of a 5-in-1 reflector (or even just a piece of black card) to absorb light and deepen the shadows. This technique, known as negative fill, is a pro move for adding contrast and definition.
One Light Setup Quick Reference Guide
To help you get started, here's a quick guide to a few classic patterns you can achieve with just one light. It's all about small shifts in position.
| Lighting Pattern | Key Light Position | Shadow Characteristic | Best For |
|---|---|---|---|
| Loop Lighting | 30-45° to the side, slightly above eye level | Creates a small "loop" of shadow from the nose on the cheek | Universally flattering; a safe and professional choice. |
| Rembrandt | Further to the side, higher angle | Forms a triangle of light on the cheek opposite the key light | Creates a more dramatic, moody, and artistic feel. |
| Butterfly | Directly in front of and above the subject | Places a small, butterfly-shaped shadow under the nose | Ideal for glamour and beauty shots, accentuating cheekbones. |
These patterns are your bread and butter in headshot photography. Once you master them with one light, you'll have a powerful toolkit for any situation.
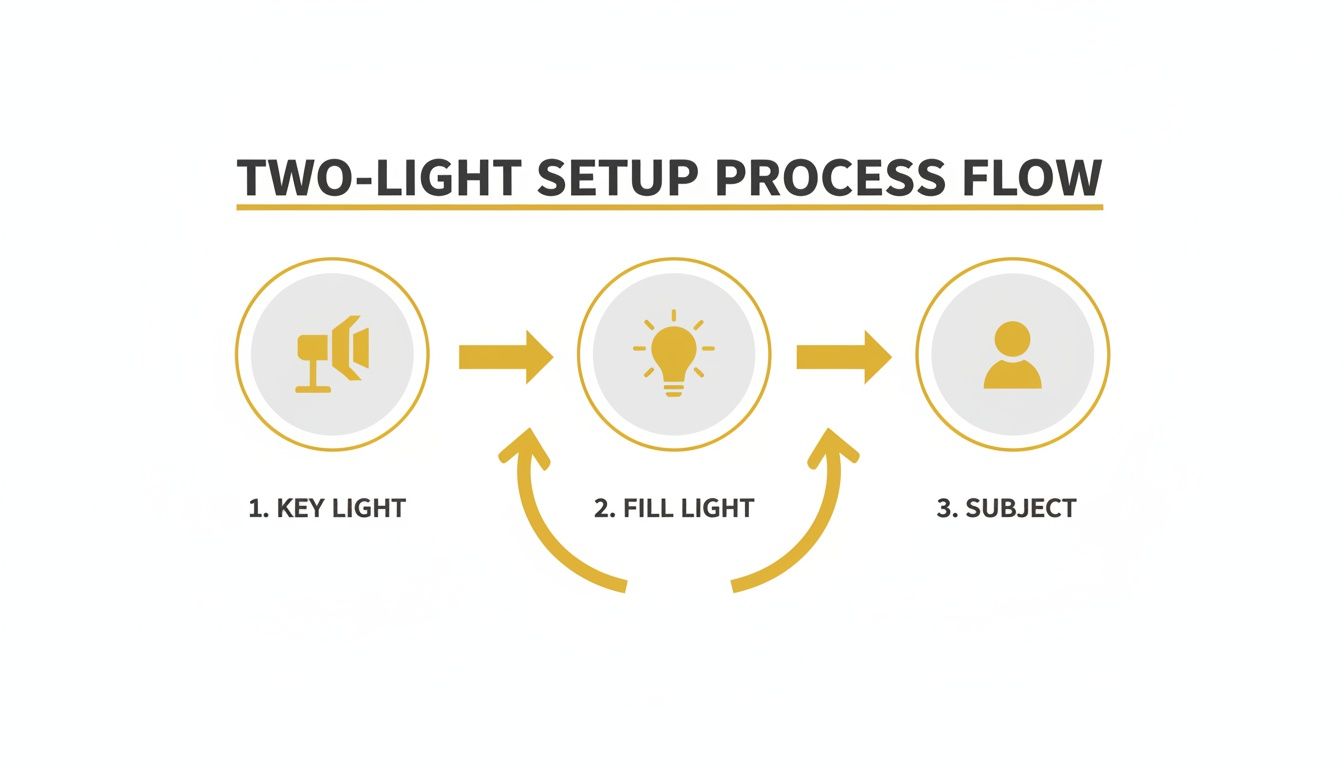
Adding Dimension with a Two-Light Setup
A single light can get you a long way, creating some truly beautiful and classic portraits. But when you bring in a second light, you’re not just illuminating your subject anymore—you’re sculpting them. This is how you start to create separation, control contrast, and give your headshots that polished, professional look you see everywhere. For most commercial and corporate work, a two-light setup is the go-to for a reason.
Most often, that second light's job is to act as a fill light. Think of it as your shadow manager. Your main (key) light has done the heavy lifting of shaping the face, but it's also created some dark areas. The fill light's role is to gently open up those shadows, giving you precise control over the final mood.
What's a Lighting Ratio, Anyway?
You’ll hear photographers talk about the lighting ratio, which is just a fancy way of describing the brightness difference between your key light and your fill light. It sounds technical, but it’s pretty simple in practice.
- A 2:1 ratio just means your key light is twice as bright as your fill. This gives you soft, gentle shadows, which is often perfect for a friendly and approachable corporate headshot.
- Crank that up to an 8:1 ratio, and now your key light is eight times brighter. You'll get deep, dramatic shadows that feel more cinematic or intense.
My Two Cents: Don't get hung up on the math. The best way to learn this is by feel. Start with your fill light turned off, then slowly bring up the power. Watch the shadows on the subject's face soften. Stop when it looks right to you. Your eyes are always your best guide.
The Classic Corporate Two-Light Look
Picture this: you’re shooting a headshot for a CEO. The one-light setup you started with looks good, but the shadows on the far side of their face are a little too deep, making them look more intimidating than authoritative. Time for a fill light.
You’ll want to bring in a second light, probably with another large softbox, and place it on the opposite side of the key light. The trick is to keep its power way down. You’re just whispering some light into the shadows, not trying to blow them away completely. A typical starting point is to have your key light at a 45-degree angle to the subject and the fill light positioned on the other side, but a bit closer to your camera's position.
This one small change can make a huge difference. The shadows soften, the portrait feels more open and professional, and you get that clean, competent look that’s perfect for the context.
Putting Your Second Light to Work Elsewhere
That second light isn’t just a one-trick pony, though. It doesn’t always have to be a fill light. One of my favorite ways to use it is as a hair light or rim light.
Try placing it behind your subject, usually on a boom arm so it’s up high and pointing down at their head and shoulders. This creates a beautiful, subtle highlight that helps in two major ways:
- It creates separation. That little pop of light on the hair and shoulders instantly pulls your subject away from the background, adding a fantastic sense of depth.
- It just looks expensive. That subtle glow gives the image a high-end, studio polish that’s tough to replicate any other way.
Once you start playing with a second light, you’ll find it opens up a ton of creative doors. You can suddenly fine-tune your lighting to perfectly match any style or mood you're going for.
Creating Polished Looks with a Three-Light Setup
When you need a headshot that looks truly polished and ready for commercial use, the three-light setup is the industry gold standard. It’s all about control. This technique lets you meticulously sculpt your subject, creating a crisp, three-dimensional image that really pops. For high-end clients who expect a premium look, this is my go-to method.
If you’re already comfortable with a two-light setup, this will feel like a natural next step. You’re simply building on that foundation of a key and fill light by adding a third light into the mix—usually as a backlight or a rim light.
Defining the Role of Each Light
In a three-point setup, every light has a very specific job. Your key light is still the star of the show. It sets the main exposure and carves out the shadows that give a person's face its shape and definition. The fill light plays a crucial supporting role, softening those shadows just enough to manage the overall contrast and set the mood.
The newcomer here is the backlight, and its job is critical for creating that professional finish. Typically placed behind the subject, often up high and angled down, it traces their hair and shoulders with a subtle line of light. This "rim" is what separates them from the background, adding an immediate sense of depth and polish.
This diagram shows how the key and fill lights work in tandem to shape the face.
The third light builds on this foundation by adding that highlight from behind, which creates a really crisp outline.
Assembling Your Three-Light Setup
Let's imagine you're shooting an actor’s headshot. You need a dynamic portrait that feels alive and really captures their personality. A three-point lighting arrangement is perfect for this scenario.
- Set Your Key Light First: I always start here. Place your main light source, maybe a large octabox, at about a 45-degree angle to your subject. Get that primary light pattern looking exactly how you want it before you touch anything else.
- Bring in the Fill: Now, position your second light on the opposite side to gently open up the shadows. Adjust its power to find the right contrast. For an actor, you might want a bit more drama than a typical corporate headshot, so you’d keep the fill power fairly low.
- Position the Backlight: Finally, place your third light behind the subject, either directly across from the camera or slightly off to one side. A strip box or a gridded spot modifier works wonderfully here because they help you control the light and keep it from spilling everywhere.
A common mistake I see is making the backlight way too strong. It should be a subtle highlight, not a glaring halo. My advice is to start with its power on the lowest setting and slowly dial it up until you just start to see a clean, defined edge on the hair and shoulders. That's all you need.
Balancing Power and Avoiding Flare
The real art of a three-light setup is in balancing the intensity of each source. My workflow is methodical: I turn on and adjust one light at a time. Start with the key, get it perfect. Then add the fill, and only then do I bring in the backlight. This approach keeps me from getting overwhelmed and chasing my tail.
Another gremlin you might run into is lens flare, which happens when the backlight shines right into your lens. Always use a lens hood. You’ll also want to position the backlight carefully so it's hidden from the camera's view, often just out of the frame or tucked behind the subject’s body. This isn't just theory; a recent industry survey found that 92% of photographers felt a three-light setup could boost client satisfaction by as much as 40% while also cutting down on retouching time. You can see pros using this exact approach in real-world shoots here.
And for those times when you want that polished look but don't have the gear on hand, PhotoMaxi's relighting tools can simulate a three-point setup. You can add a virtual key, fill, and rim light to an existing photo, which is a fantastic way to either learn how the lights interact or to fine-tune a studio portrait after the session is over.
Fine-Tuning Your Lighting and Directing Poses
Once you have your key, fill, and rim lights in place, the real creative work begins. The line between a good headshot and a fantastic one is often drawn with subtle tweaks to your lighting and how you direct your subject. These are the advanced touches that give your work that final layer of polish and intention.
A pro technique I use all the time is feathering the light. Instead of aiming the softbox's hotspot right at your subject's face, point it slightly ahead of them. This allows the soft, diffused edge—the "feathered" part—of the light to gently illuminate them. The result is an exceptionally soft, gradual wrap-around glow that looks incredibly flattering on almost anyone.
Another powerful tool is negative fill. A reflector bounces light back to soften shadows, but a black card or v-flat does the exact opposite. Placed opposite your key light, it absorbs any stray light and stops it from bouncing around the room and filling in the shadows. This carves out deeper, more defined shadows, adding a sense of drama and definition that’s perfect for a more intense, moody portrait.
Bringing Out Authentic Expressions
Your lighting can be technically perfect, but it all falls apart if your subject looks awkward or uncomfortable. A huge part of our job as photographers is to be a director. The goal isn't just to pose someone but to guide them into a state where they feel natural and give you genuine expressions.
Forget static commands like "say cheese!" or "smile." It never works. Instead, get them talking or give them a scenario to imagine. I often ask clients to think about a major win in their career—that little glimmer of pride in their eyes and the subtle, confident smile that follows is far more authentic than a forced grin.
Guiding your subject with gentle direction is everything. Small adjustments like tilting their chin down, turning their shoulders slightly, or telling a bad joke to get a real laugh can completely transform a portrait from a simple photo into a window into their personality.
The connection between how you light someone and how they're perceived is huge. For instance, recent corporate headshot trends show a 75% increase in broad, full-face lighting setups since 2010. These setups are flattering for about 90% of subjects and tend to project trustworthiness. It’s no surprise that a LinkedIn study found profiles with these types of headshots received 40% more connection requests in major industries. You can see a great breakdown of popular headshot lighting setups here.
Matching the Vibe to the Goal
At the end of the day, a headshot has a job to do. A portrait for an artist or musician might call for dramatic, high-contrast light, while a therapist's headshot needs a soft, warm, and approachable feel. Before you start shooting, always ask yourself: what story does this image need to tell?
- For Competence and Authority: Try harder light sources or stronger lighting ratios. This creates defined shadows that project confidence and seriousness.
- For Warmth and Approachability: Go with large, soft light sources placed closer to the camera's axis. This gives you a clean, open, and friendly look.
By combining these advanced lighting tweaks with thoughtful direction, you can create headshots that not only look incredible but also send a specific, intentional message. If you want to dive deeper into this, our guide on professional photoshoot poses has even more tips to help you get the best out of your subjects.
Your Top Headshot Lighting Questions, Answered
Even when you follow a guide to the letter, things can go sideways on a shoot. It happens to everyone. Let's tackle some of the most common questions and roadblocks you'll hit when dialing in your light setup for headshots.
Flash or Continuous Light: Which Is Better?
Ah, the classic debate. Honestly, it comes down to how you like to work.
Continuous LED lights are a fantastic starting point, especially if you're new to lighting. What you see is what you get (WYSIWYG), which takes a lot of the guesswork out of the equation. You can physically move the light around and see the shadows shift in real-time, making the learning process much more intuitive.
That said, strobes (or flash) pack a serious punch. They're way more powerful than most continuous lights, which gives you the freedom to overpower any distracting ambient light in the room. This power lets you shoot at a low ISO for super clean, noise-free images. Plus, their incredibly short flash duration freezes motion perfectly, which is a secret weapon for capturing those fleeting, natural expressions. Most pros eventually land on strobes for that raw power and consistency.
How Do I Fix Harsh Shadows?
If you're seeing harsh, distracting shadows on your subject’s face, the cause is almost always the same: your light source is too small or too far away. The solution is simple—you need to increase the apparent size of your light source relative to your subject.
You have two main ways to do this:
- Get closer. Simply move your light and modifier closer to the person you're photographing. The closer it gets, the softer and more beautifully it will wrap around their features.
- Go bigger. Use a larger light modifier. A 48-inch octabox will create dramatically softer light than a 24-inch one placed at the same distance.
Still finding the shadows a bit too dark? Grab a reflector or a second light on very low power and place it on the opposite side. This will kick just enough light back into the shadows to soften the contrast without killing the mood.
The goal isn't to blast away all the shadows! Well-placed shadows create shape, depth, and drama. You just want them to be a deliberate choice, not a happy accident.
Why Do My Photos Look Grainy?
Digital noise, or grain, is usually blamed on a high ISO. While that's part of the story, the real culprit is often underexposing the shot and then trying to crank up the brightness when you edit. Noise loves to hang out in the dark parts of an image, and it comes roaring to life when you push your exposure in post.
Here’s a pro tip: it's much better to get the exposure right in the camera, even if it means bumping up your ISO a little. A correctly exposed photo at ISO 800 will almost always look cleaner and more professional than a dark, underexposed shot at ISO 400 that you had to rescue later.
For more inspiration on what a clean, polished final image can look like, check out our guide to AI-generated headshots.
Feeling stuck with the gear you have? PhotoMaxi gives you a complete virtual studio to play with. Upload a photo and use our AI relighting tools to add, move, or change your lighting. You can test out a classic Rembrandt look or build a complex three-point setup—all without touching a single light stand. See how it works at https://photomaxi.com.
Related Articles


Ready to Create Amazing AI Photos?
Join thousands of creators using PhotoMaxi to generate stunning AI-powered images and videos.
Get Started Free