The Ultimate Guide to Lighting Setup for Headshots
When you're setting up for a headshot, the classic approach usually involves two or three lights. You have a main light to illuminate your subject, a second light to soften any harsh shadows, and sometimes a third one behind them to make them pop from the background. The real goal here is to use light to sculpt the face, creating depth and a feeling that matches who they are, whether it's for a corporate profile or an actor's portfolio.
Getting the Lighting Right: The Basics
Before you start plugging in strobes and setting up stands, it's crucial to get a handle on why we place lights where we do. Good lighting isn't just about making someone visible; it's an art form. You're shaping features, creating mood, and telling a story with every light you place.
Think of it this way: a great headshot is a conversation between light and shadow. The way you balance these two elements is what defines the mood, highlights a person's best features, and gives a flat, two-dimensional photo a sense of real-world depth.
The Core Lights in Your Toolkit
Most professional lighting setups are built from three fundamental light sources. You can certainly get incredible results with just one or two, but knowing how all three work together gives you complete creative freedom.
- Key Light: This is your MVP, the main source of light. It's the brightest one in the setup and dictates the overall exposure and character of the portrait.
- Fill Light: Placed on the opposite side of the key light, its only job is to "fill in" the shadows. It’s always less powerful than the key, letting you control the contrast so shadows don't become too dark or distracting.
- Backlight (or Rim Light): This light lives behind your subject. It creates a subtle, glowing outline around their hair and shoulders—an effect often called a "rim" or "kicker." This is what separates them from the background, adding that final professional polish.
The history of professional photography is really the history of mastering these lights. Back in the 1930s, pioneers like George Hurrell were creating iconic Hollywood portraits using dramatic key-to-fill ratios of up to 16:1. That's what gave those images their sculpted, high-drama look. Today, things are a bit different. A recent Professional Photographers of America (PPA) survey found that 85% of headshot photographers now rely on a two-light setup as their starting point. This simple approach is proven to cut down on common mistakes like harsh shadows by 40% compared to what you often see from single-light amateur attempts. You can dig into how modern pros break down their setups to see these principles in action.
Here's a quick look at how these lights function in a typical arrangement.
Core Lighting Components and Their Functions
This table breaks down the essential lights you'll use, their main purpose, and the go-to tools for shaping their output.
| Light Type | Primary Function | Common Modifiers |
|---|---|---|
| Key Light | Establishes the main exposure and lighting pattern on the face. | Softbox, Octabox, Beauty Dish |
| Fill Light | Softens shadows created by the key light to control contrast. | Large Reflector, Umbrella, V-Flat |
| Backlight | Separates the subject from the background with a light outline. | Small Stripbox, Grid Spot, Bare Bulb |
Knowing these roles inside and out is the first step toward creating intentional, repeatable results.
Setting the Mood with Lighting Ratios
The balance between your key light and your fill light is called the lighting ratio. This simple ratio is your primary tool for controlling the contrast on your subject’s face, which in turn sets the entire mood of the photo. A low-contrast ratio gives you a soft, open, and friendly look. A high-contrast ratio, on the other hand, produces a more dramatic, chiseled, and serious feel.
Pro Tip: Think of lighting ratios as a volume knob for drama. A 2:1 ratio is like a friendly conversation, perfect for corporate or team headshots. An 8:1 ratio is more like a dramatic monologue, ideal for actors, artists, and authors.
Shaping the Light with Modifiers
You almost never point a bare, naked bulb at someone in headshot photography. Light modifiers are what you put between your light source and your subject to shape, soften, or direct the beam. The modifier you pick has a massive impact on the final image.
A softbox, for example, creates a beautiful, soft light that seems to wrap around the subject’s face, which is incredibly flattering and minimizes skin texture. A beauty dish gives you a slightly punchier, more contrasted light that’s a favorite in fashion and beauty work. Getting to know your modifiers is just as important as knowing how to operate your lights.
Mastering Single Light Setups for Flawless Headshots
Some of the most powerful and timeless headshots are created with just one light. It might sound too simple, but this approach forces you to master the fundamentals of shaping a face with light and shadow. Don't mistake simplicity for a lack of sophistication; a single light, placed with intention, delivers absolutely stunning, professional results.
The real beauty of a one-light setup is its incredible versatility. Just by shifting the light's position relative to your subject, you can completely change the mood of the portrait—from bright and approachable to dramatic and sculpted. It’s the perfect way to work in tight spaces or for photographers who need to travel light.
Achieving Timeless Lighting Patterns
Three classic patterns are the bedrock of single-light headshot photography. Once you nail these, you'll have a robust toolkit for just about any client that walks through your door.
- Loop Lighting: This is my go-to starting point for most corporate headshots. You'll want to position your light source slightly above eye level and about 30-45 degrees to the side of the camera. The goal is to create a small "loop" of shadow from the nose pointing down toward the corner of the mouth. It's universally flattering.
- Rembrandt Lighting: Ready for more drama? Move the light further to the side and raise it a bit higher. This carves out a distinct triangle of light on the cheek of the shadow side of the face. It’s a classic for a reason, adding a ton of depth and character.
- Butterfly Lighting: For this one, you'll place the light directly in front of and high above your subject, aiming it down. This creates a symmetrical shadow right under the nose that looks like a butterfly's wings. You’ll see this all the time in beauty and glamour photography because of how well it highlights cheekbones.
The core of any lighting arrangement, whether you use one light or five, breaks down into a few key roles. This is how they work together.
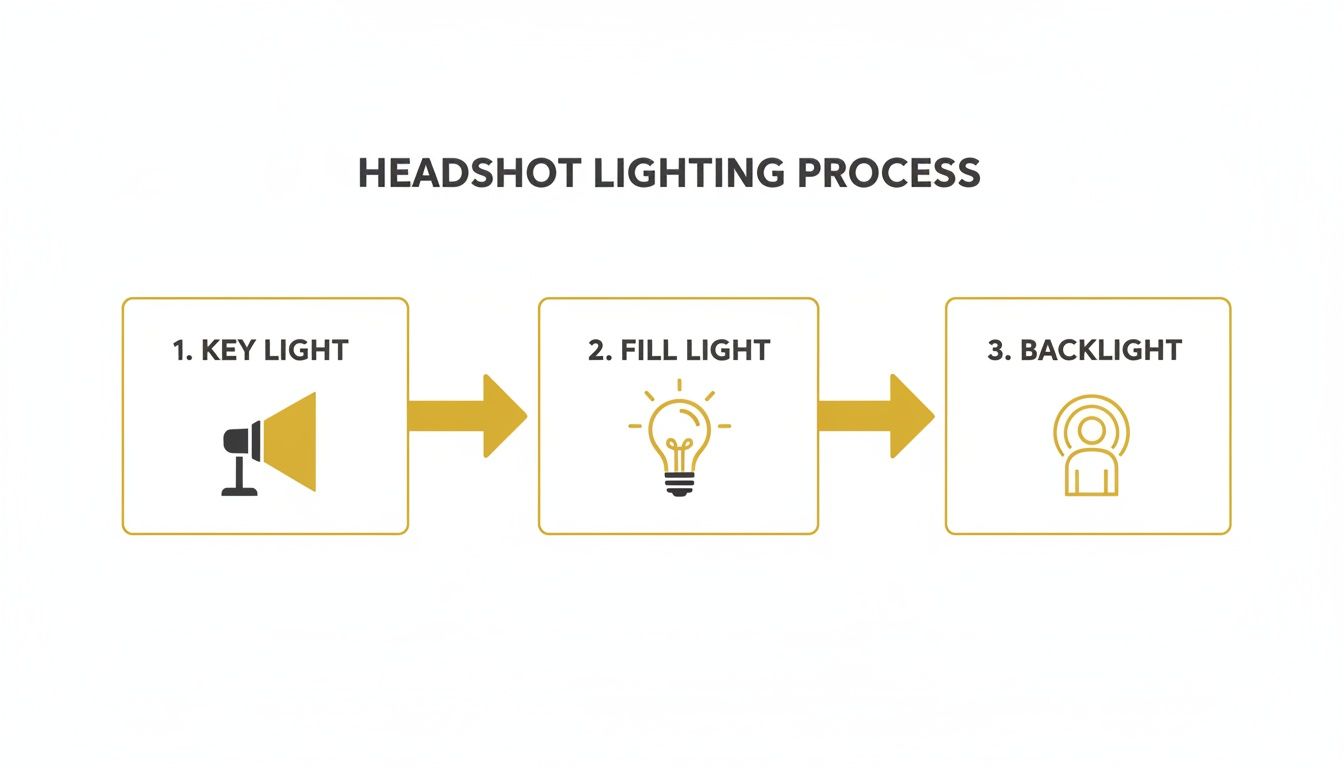
This graphic really simplifies it: the key light is your main source, the fill light softens shadows, and the backlight creates separation. Every setup is just a variation on this theme.
Dialing in Your Camera for a Crisp Look
Of course, great lighting needs the right camera settings to truly sing. The main objective is to make your subject the absolute star of the show, which means overpowering any ambient light in the room and keeping your subject tack-sharp.
Flick your camera into manual mode—you need full control here.
A good starting recipe looks like this:
- Aperture: I usually live between f/2.8 and f/5.6. This range gives you a shallow depth of field, which melts the background away and makes your subject pop right off the screen.
- Shutter Speed: Stick to 1/125s or faster to kill any chance of motion blur. If your flash can handle it, 1/200s is an even safer bet.
- ISO: Keep your ISO as low as it can go, usually 100 or 200. This guarantees a clean, noise-free image, which is non-negotiable for professional work.
With these settings, you’re basically telling your camera to ignore all the junk light in the room. The only light that will register is the beautiful, clean light from your strobe.
Mimicking a Two-Light Setup on a Budget
So what happens when you want the soft, balanced look of a two-light setup but only have one strobe? The humble reflector becomes your new best friend. By placing a reflector on the opposite side of your key light, you can bounce light back into the shadows on your subject's face.
This simple trick effectively turns your single light into both a key light and a fill light. A silver reflector will give you a punchier, brighter fill, while a white one offers a softer, more natural look. It’s an absolute game-changer.
The efficiency of a single-light setup is well-proven. For example, Pye Jirsa of SLR Lounge demonstrates a pro method using just one speedlight at f/6-7, ISO 200, and 1/200s to eliminate distortion and ambient light, a perfect recipe for studios under 50 sq ft. Data from studio photographer training reveals this approach can slash setup time by up to 75%, leading to faster client sessions and a 25-30% increase in average spend. You can see the full single-light tutorial to watch it in action.
Replicating Professional Lighting with AI
If you don’t have access to studio gear, you're not out of luck. You can still create these classic looks using AI-powered tools. With a platform like PhotoMaxi, you can upload a simple photo and apply any of these lighting patterns virtually. The AI relighting feature lets you simulate a Rembrandt, loop, or butterfly setup in seconds, giving you incredible creative control without touching a single piece of equipment.
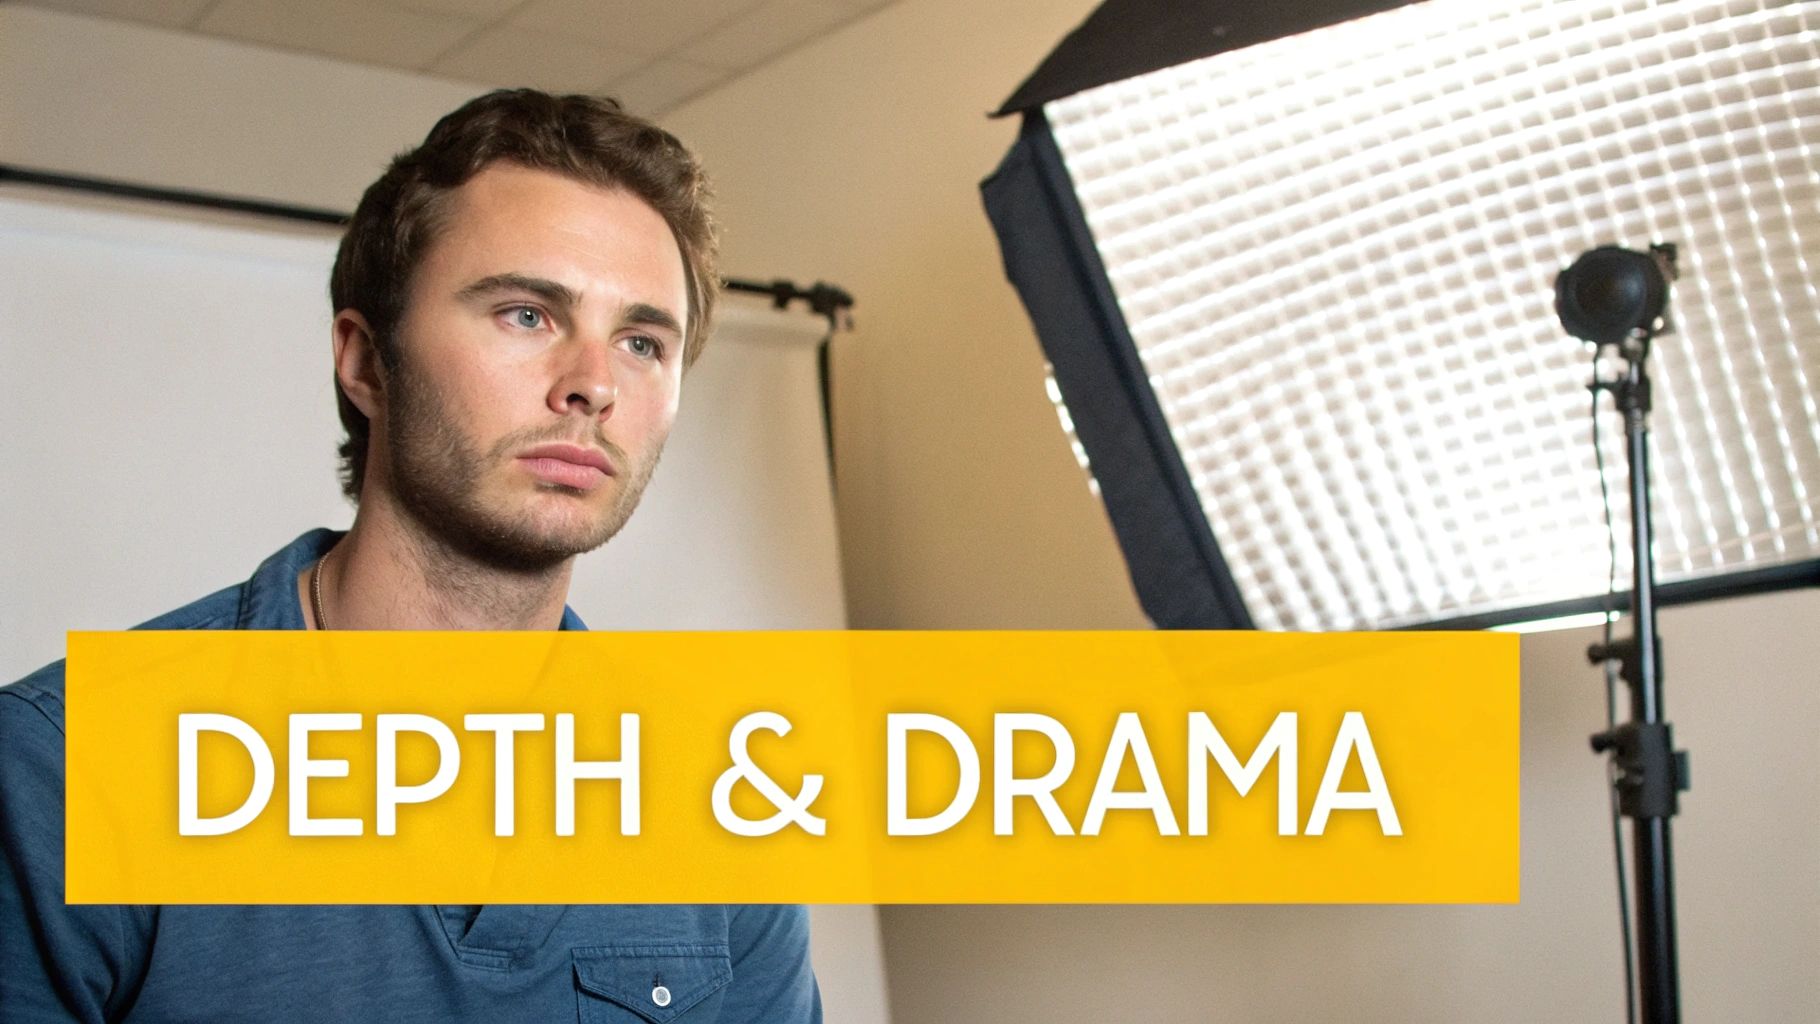
Creating Depth and Drama with Multiple Lights
When you're comfortable with a single light, the real fun begins. Adding a second or even a third light is where you move from just taking a picture to truly sculpting your subject. This is how you create that polished, professional look that makes a headshot stand out.
Adding fill and rim lights lets you precisely control how light and shadow play across your subject’s features. You’re not just illuminating them anymore; you’re painting with light to build depth and separate them from the background.
Introducing the Fill Light to Manage Shadows
Your first move after setting up your main (key) light is almost always to add a fill light. Its only job is to soften the shadows created by the key light. Without it, you can get harsh, distracting shadows that swallow up one side of the face. While that can be cool for a dramatic portrait, it’s rarely the look a corporate client is going for.
You'll want to place the fill light on the opposite side of the camera from your key light. The secret here is all about the power ratio. Your fill light must be less powerful than your key light. If you make it too bright, you’ll kill all the shadows, making the face look flat and losing all sense of dimension. A great starting point is setting your fill light to half the power of your key light (a 2:1 ratio) and then tweaking it until it looks right.
Crafting Separation with a Rim or Hair Light
To really make your subject pop, you can bring in a third light—a rim light, sometimes called a hair light. This one goes behind the subject, aimed at the back of their head and shoulders. It creates a subtle, bright outline that cleanly separates them from the background. This little touch adds an incredible amount of polish and a three-dimensional feel.
A common mistake I see all the time is cranking this light up too high. An overpowering hair light just creates a weird, distracting glow instead of a delicate, defining edge.
Pro Tip: A good rule of thumb is to keep your hair light's power way down. It should be just bright enough to define the edges of your subject without blowing out the highlights on their hair or clothes.
Sculpting Shadows with Advanced Tools
For the ultimate level of control, a few extra tools can make a huge difference in how you shape both light and shadow.
- Grids: These are honeycomb-patterned inserts that snap onto your softbox. They focus the light into a tighter beam, preventing it from spilling all over your background. They're perfect for precisely aiming a hair light without contaminating the rest of your scene.
- Flags and Negative Fill: Sometimes, the goal isn't to add light but to add more shadow. A "flag"—which can be as simple as a piece of black foam core—blocks light and deepens shadows. This technique, called negative fill, is fantastic for enhancing dimension and creating a more chiseled, sculpted look.
Building High-Key and Low-Key Looks
With a few lights at your disposal, you can easily create two classic headshot styles: high-key and low-key.
A high-key setup is all about bright, even lighting. It creates an optimistic, approachable vibe and is often shot against a pure white background. This look requires multiple lights to blast both the subject and the backdrop, wiping out nearly all shadows. It's a go-to for many commercial and corporate clients.
On the other hand, a low-key setup embraces deep shadows and stark contrast for a much moodier, more dramatic feel. For this, you’ll use very little fill light (or maybe just some negative fill) and keep the background dark. This style works beautifully for actors, artists, or anyone looking for a more intense portrait. It’s all about controlling where the light doesn't go.
Dramatic lighting can make or break a brand's image. Strong key-to-fill ratios of 8:1 or higher produce the bold contrast you see on magazine covers. In fact, some reports show that 90% of corporate clients prefer this style to project leadership, as the shadows help sculpt 60-70% of the facial depth. But be careful—an overpowered hair light set at 20-30% of the key light’s power can blow out highlights on up to 40% of faces, killing the shot. Keeping your hair light under 10% of the key’s power is an easy fix. You can find more great insights on how lighting choices impact business portraits.
Simulating Complex Setups with AI
Getting the hang of a multi-light lighting setup for headshots definitely takes practice. But AI tools can give you a massive shortcut. Platforms like PhotoMaxi let you upload a simple photo and then apply incredibly complex lighting simulations. Want to see what a dramatic low-key look with a perfect rim light looks like on your subject? You can generate and fine-tune it with a few clicks, giving you the power of a full studio without any of the physical gear.
Choosing the Right Gear for Your Studio
Putting together the right equipment for your headshot lighting is a direct investment in your creative work. The gear you pick has a huge impact on the quality and style you can achieve, but here's the good news: you don't have to spend a fortune to get professional results. The first step is really just understanding the key differences between your main light sources and the tools you use to shape them.
Your biggest decision right out of the gate is what kind of light to use. Each option brings its own workflow, benefits, and drawbacks to the table.

Strobes vs Speedlights vs Continuous Lights
Photographers love to debate these three, but when it comes to headshots, the choice usually boils down to power, portability, and what you see through your camera.
Speedlights: These are the small flashes you often see mounted on top of a camera, but they really shine when used off-camera with a wireless trigger. Their main appeal is portability and affordability. The trade-off? They have less power and take longer to recycle between flashes, which isn't ideal for rapid shooting or trying to overpower a bright, sunny day.
Studio Strobes (Monolights): This is the workhorse of almost every portrait studio. Strobes pack a much bigger punch than speedlights, recycle faster, and usually include a modeling lamp so you can preview where the light will fall. All that power gives you the freedom to use huge light modifiers and shoot at a low ISO for incredibly clean, crisp images.
Continuous LED Panels: Unlike flashes that pop, these lights stay on constantly. This "what you see is what you get" approach is a game-changer for beginners who are still learning how to see and shape light. Modern LEDs have fantastic color accuracy, but you'll find that powerful, high-quality panels can cost more than a good entry-level strobe.
For most photographers getting serious about headshots, studio strobes offer the best balance of power, control, and value. They deliver the professional punch you need to create polished portraits time and time again.
Shaping Light: The Role of Modifiers
A bare lightbulb is harsh, creating sharp, unflattering shadows. Light modifiers are the essential tools you attach to your light source to soften, shape, and direct that light. They transform a harsh spotlight into a beautiful, wrapping glow, and the modifier you pick will completely define the look and feel of your headshot.
Learning to shape light is a core skill in photography. For anyone interested in seeing how these same ideas apply elsewhere, our guide on how to take better product photos touches on very similar principles.
Ultimately, the right modifier can make a headshot feel soft and approachable or edgy and dramatic. It's all in how you shape the light.
When you're starting out, it can be tough to know which modifier does what. They all look a little different, and each one creates a unique quality of light that's suited for a specific purpose.
Light Modifier Comparison for Headshots
This table breaks down the most popular light modifiers to help you choose the right tool for your desired headshot style.
| Modifier | Light Quality | Best For | Control Level |
|---|---|---|---|
| Softbox/Octabox | Soft, diffused, and even | Flattering corporate and lifestyle headshots; mimics window light. | High |
| Umbrella | Broad and soft (shoot-through) or slightly more contrasted (reflective) | Quick and easy setups; great for beginners and group shots. | Low-to-Medium |
| Beauty Dish | Semi-hard with soft edges; creates contrast and sculpts features. | Fashion, beauty, and dramatic portraits that need a defined look. | Medium |
| Stripbox | Long, narrow strip of soft light | Creating precise rim lights, hair lights, and edge highlights. | Very High |
Choosing the right tool from this list comes down to the look you're trying to achieve. A softbox is a safe and beautiful bet for almost any corporate headshot, while a beauty dish will give you that extra pop and contrast needed for an actor or model.
Recommended Gear Kits for Every Level
Jumping into gear can feel overwhelming, so I've put together three recommended kits based on different budgets and goals.
The Budget-Friendly Starter:
- Light: One reliable speedlight (like a Godox V860III).
- Modifier: A versatile 48" shoot-through umbrella.
- Essentials: A sturdy light stand and a wireless flash trigger. This simple kit is incredibly portable and perfect for mastering classic one-light setups.
The Versatile Enthusiast:
- Lights: Two 300Ws studio strobes (like the Godox MS300).
- Modifiers: One 36" octabox for your main light and a 5-in-1 reflector to bounce some light back into the shadows.
- Essentials: Two light stands, a wireless trigger system, and a C-stand for more precise and secure positioning.
The Professional Studio Investment:
- Lights: Three 500Ws+ strobes from a professional brand (like a Profoto D2 or Godox AD600 Pro).
- Modifiers: A large 48" octabox, a 22" beauty dish with a grid, and two 1'x4' stripboxes for rim and hair lights.
- Essentials: Multiple C-stands with boom arms, V-flats for controlling shadows (negative fill), and a rock-solid trigger system.
Bringing It All Together: The Details Beyond the Lights
Getting your lights in the right place is just the first step. The real magic in a headshot happens when you start finessing the details—the pose, the wardrobe, and all the little things that turn a good photo into a great one. Once your strobes are set, your full attention needs to pivot to the person in front of your camera.
Think of your lighting and your subject's pose as a dance. They have to work together. A classic Rembrandt setup, for example, is entirely dependent on the subject’s head position to create that iconic triangle of light under the eye. If they turn their head just a few inches the wrong way, the entire effect vanishes. Your job is to guide them into that sweet spot.
Posing Is All About the Light
You don't need to be a posing guru, but you do need to understand how small tweaks affect the light. The classic "chin down and forward" trick is a lifesaver for defining the jawline. Asking your subject to lean in slightly from their hips can instantly make the shot feel more connected and dynamic.
With every little adjustment, watch the light. See how it wraps and falls. Does turning their shoulder toward the key light sculpt their face more effectively? Does a tiny head tilt bring a more lively catchlight to their eyes? These micro-adjustments are what separate a snapshot from a professional portrait.
Wardrobe and Backgrounds Matter More Than You Think
The clothes your subject wears are basically a part of your lighting setup. A bright white shirt can bounce a surprising amount of light back into the face, acting as a built-in reflector that softens shadows—which isn't always what you want. On the flip side, a dark velvet blazer will just eat light, meaning you might need to bump up your fill to keep the details from getting lost.
Your backdrop is just as important.
- Dark Backgrounds: These are perfect for dramatic, low-key portraits. They soak up light and make a subtle rim light pop, carving your subject out of the background.
- Light Backgrounds: A white or light gray wall will bounce light all over the place. This gives you a natural fill for a bright, airy, high-key look with minimal effort.
- Textured Backgrounds: Things like painted canvas or brick can add a ton of character, but be careful. You don’t want the background to steal the show. A shallow depth of field, somewhere around f/2.8 to f/4, will keep the focus squarely on your subject.
Pro tip: Have the wardrobe conversation before the shoot. I always tell my clients to bring solid colors and simple necklines. It avoids distracting patterns and saves a ton of headaches on shoot day.
Solving Common Headshot Problems on the Fly
Even the most meticulously planned shoot will have its curveballs. Knowing how to handle them is what makes you a pro.
One of the biggest culprits is glare from glasses. The fix is usually surprisingly simple: raise your main light higher than you think you need it, or move it further off to the side. You can also ask your subject to tilt their head down just a fraction of an inch or even adjust the glasses on their face until the reflection is gone.
Another thing to watch for is the catchlights in the eyes. You’re aiming for a single, crisp reflection of your light source, ideally around the 10 or 2 o'clock position. If you see multiple distracting light spots, it can make the subject look unfocused. This usually means you have too many lights firing or there’s too much ambient light competing with your strobes.
Finally, remember that light falls differently on every face and skin tone. A big, soft light source, like a large octabox, is almost universally flattering because it smooths skin texture and wraps gently around facial features. For those moments when you can't quite nail it in-camera, it's worth knowing how modern AI for photography can help. These tools can let you relight a face or tweak shadows in post-production, giving you one more powerful way to perfect every last detail.
The AI Advantage: Recreating Any Lighting Setup Instantly
Imagine having a full studio’s worth of gear at your fingertips, but without owning a single light stand. This is where AI tools are completely changing the game. Instead of spending hours physically arranging strobes and modifiers, you can achieve any of the looks in this guide with just a single photo.
Platforms like PhotoMaxi were built to bridge the gap between traditional photography and the demands of modern content. The concept is straightforward: take a decent image of a person and instantly apply a new lighting setup for headshots. It simulates everything—the light's direction, its intensity, even its color.
Simulating Studio Light with a Click
The workflow is incredibly simple. You can start with one well-lit photo and use it as a base to generate dozens of variations.
Curious how that dramatic Rembrandt setup would look compared to a soft butterfly light? Instead of moving heavy equipment around, you just click a different lighting style and let the AI do the heavy lifting.
This screenshot from PhotoMaxi's AI Studio gives you a peek at the interface. You can see presets like "Backlight" or "Studio Light" ready to go.
The real power here is being able to experiment and fine-tune at a speed that’s just not possible with physical gear. You can iterate until the shot is perfect.
This is a huge advantage for anyone who needs consistent, high-quality visuals on a budget or a tight deadline. A marketing team could generate an entire library of campaign assets without ever booking a studio. An e-commerce brand could finally get perfectly uniform lighting across all their model shots.
For creators, this means you can build a strong, consistent personal brand with professional-looking headshots, even if you’re just starting out. The technology handles the technical lighting complexities, freeing you up to focus on the creative vision.
This approach doesn't just save a ton of time and money; it opens up professional photography to everyone. You no longer need to invest thousands in equipment to produce images that look like they came out of a high-end studio.
If you want to see this in action for portraits, you can learn more about using an AI headshot generator for free and check out the results yourself. It’s a seriously efficient way to elevate your visual content.
Got Questions About Headshot Lighting? We've Got Answers.
Even with a solid game plan, you're bound to run into a few questions when you start setting up your lights. It happens to everyone. Let's tackle some of the most common ones I hear from other photographers.
What's The Best Single Light For A Beginner?
If you can only invest in one light to start, make it a large softbox. Hands down. The diffused light it produces is incredibly forgiving and flatters just about every face shape and skin tone you'll encounter.
I’d recommend starting with a 36" or 48" octabox. The beautiful, soft light it creates is very similar to a bright, overcast window, which makes getting professional-looking results much easier right out of the gate.
How Do I Light Someone Who Wears Glasses?
Ah, the classic glasses glare problem. We've all been there. The trick is to adjust the angle of your main light so the reflection doesn't bounce directly back into your camera lens.
Start by raising your key light higher than you normally would and moving it a bit more to the side. Sometimes, a tiny adjustment in your subject's head tilt is all it takes to make the glare disappear.
Think of it like this: the light hits the glasses and reflects off at the same angle it came in. To kill the glare, you just need to move your light or camera so you're not in that reflection's direct path.
What's The Best Lens For Headshots?
While you can get great results with a few different lenses, the sweet spot for most headshot photographers is a prime lens somewhere in the 85mm to 135mm range. There's a reason it's the industry standard.
This focal length gives you that beautiful background compression that makes your subject pop and is incredibly flattering for their facial features. It also lets you keep a comfortable working distance from your client, which almost always helps them relax and feel less intimidated by the camera.
Ready to skip the setup and get straight to stunning results? With PhotoMaxi, you can apply any professional lighting style to your photos in seconds. Create your perfect headshot today at https://photomaxi.com.
Related Articles


Ready to Create Amazing AI Photos?
Join thousands of creators using PhotoMaxi to generate stunning AI-powered images and videos.
Get Started Free