How to Take Better Product Photos That Drive Real Sales

Taking great product photos really boils down to three things: mastering your light, creating a clean background, and planning your shots before you start. It doesn't matter if you're using the latest DSLR or just your smartphone; focusing on these fundamentals is the fastest way to create images that look truly professional and actually make people want to buy.
Your Foundation for High-Converting Product Photos
Before you even think about hitting that shutter button, the prep work you do is what really sets you up for success. I've seen it time and time again: great product photography isn't about having a Hollywood-sized budget. It's about being strategic and building a solid foundation. The best images start with smart choices long before the camera even comes out of the bag.
This is all about being resourceful. You absolutely do not need a massive studio or thousands of dollars in equipment to get pro-level results. Some of the most successful online stores I've seen started with a simple setup in a spare room. Technique and planning will always beat expensive gear.
Choosing Your Photography Gear
Let's bust a huge myth right now: you probably already own a camera that’s more than good enough. The cameras packed into modern smartphones from Apple, Google, and Samsung are incredible pieces of technology. They can produce sharp, high-resolution images that are perfect for any e-commerce site.
If you're just starting, your phone is your greatest asset. The trick is to support it properly. A simple tripod with a phone mount is a non-negotiable, and you can get a solid one for as little as $25. This one little tool completely eliminates camera shake, guaranteeing your images are consistently crisp. Trust me, nothing screams "amateur" and loses a customer's trust faster than a blurry photo.
For those who are ready to step up their game, a DSLR or mirrorless camera offers far more manual control. Being able to change lenses and shoot in RAW format gives you a ton of flexibility when you get to the editing phase. A versatile "nifty fifty" (50mm) lens is a fantastic starting point for product shots; it delivers tack-sharp focus and a really natural perspective that isn't too wide or too zoomed in.
Key Takeaway: The best camera is the one you have with you. Seriously. Focus on stabilizing your device with a tripod and getting your lighting right before you even think about spending big money on a new camera body or fancy lenses.
Building a Simple DIY Studio
Your "studio" doesn't have to be a dedicated room. It can be a corner of your office, a guest bedroom, or even your kitchen table when it's cleared off. The whole point is to create a controlled, repeatable environment so you can get consistent results every single time you shoot.
Here’s a simple, super-effective setup I recommend to everyone:
- A Sturdy Surface: Grab a folding table or use a desk. Just make sure it's near your main light source.
- A Seamless Background: Tape a big piece of white poster board or a roll of craft paper to the wall behind your table. Let it curve down gently onto the surface. This creates what's called an "infinity sweep," and it's the secret to getting rid of those distracting lines and corners in your background.
- Light Modifiers: This is where the magic happens, and it doesn't have to be expensive. A simple white foam board from any craft store is one of the best reflectors you can buy. Place it opposite your light source to bounce soft, flattering light back onto your product, which helps fill in any harsh shadows.
This basic, repeatable setup ensures every product is shot against the same clean background. That consistency is what builds a cohesive, professional-looking online store and a strong brand identity.
This visual guide neatly lays out the four key prep steps: picking your gear, setting up your space, sorting out the lighting, and making a solid shot list.
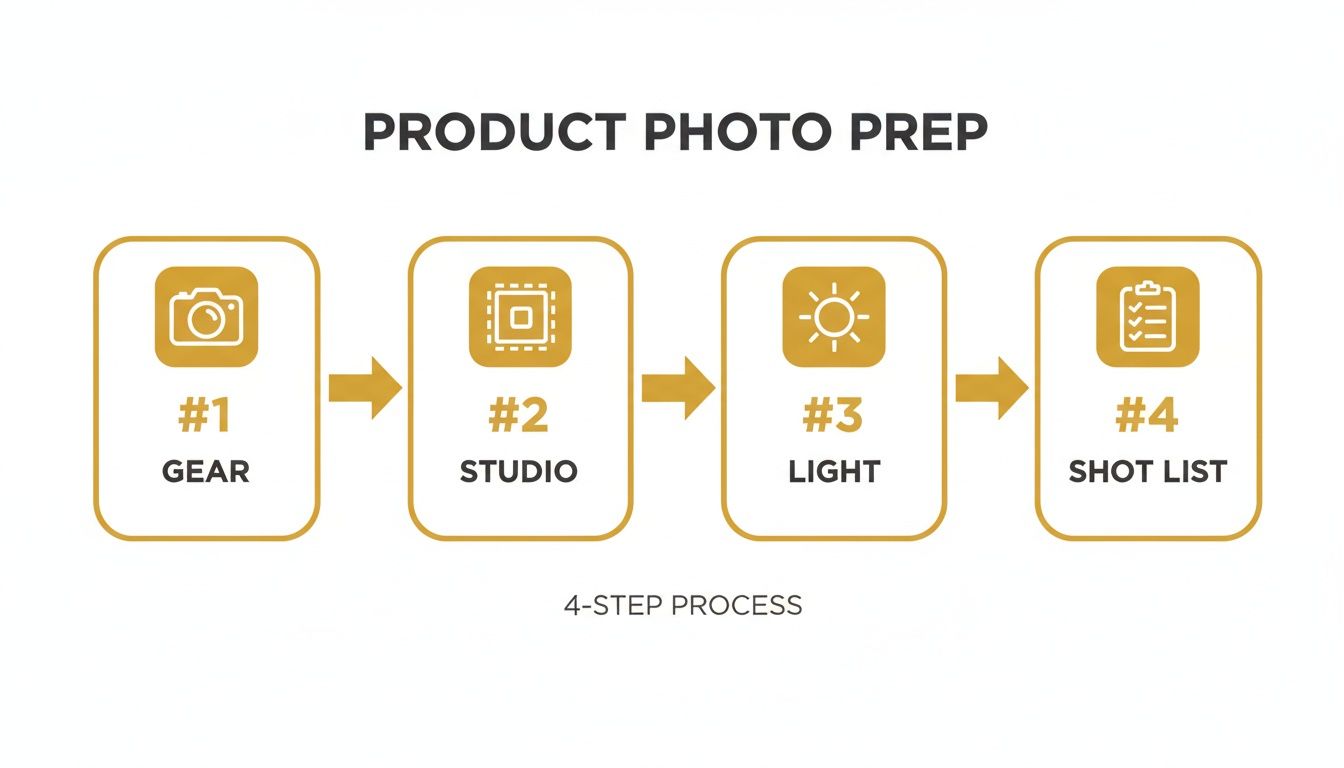
Following a workflow like this turns what can be a chaotic process into a streamlined system. You’ll know you've covered all your bases before the real work begins.
Planning Your Shot List
Last but not least, never, ever start a photoshoot without a plan. A shot list is your roadmap. It's a simple checklist of every single image you need to capture for one product. It guarantees you won't forget a critical angle and helps you work way more efficiently. A good shot list should visually answer any question a potential customer might have.
Make sure your list covers these bases:
- The Hero Shot: This is your main image—a clear, straight-on view of the product against that clean background.
- Angle Shots: Get photos from the back, both sides, and a top-down view to show the product's full dimension.
- Detailed Close-ups: Use a macro setting or get in close to highlight interesting textures, high-quality materials, or unique craftsmanship.
- In-Context/Lifestyle Shots: Show the product being used or place it next to a common object (like a coffee mug or a phone) to give people an intuitive sense of its scale.
Thinking through these shots beforehand will save you an incredible amount of time and frustration. More importantly, it ensures you walk away with a complete set of high-converting images for every product you list.
Mastering Lighting and Backgrounds for Impact

Alright, you've got your camera and a plan. Now it's time to tackle the two elements that truly make or break a product shot: lighting and the background. Think of them as your primary storytelling tools. Lighting carves out texture and sets the mood, while the background gives your product a place in the world.
Nailing these is what separates a forgettable snapshot from a professional photo that actually convinces someone to click "buy." It's no exaggeration—great lighting can make a $50 product look like it's worth $500. It's probably the most critical skill you'll develop on this journey.
H3: The Power of Hard Light vs. Soft Light
Not all light is the same, and understanding the difference between "hard" and "soft" light is a genuine game-changer. It's like knowing when to speak forcefully versus when to be more subtle.
Hard light comes from a direct, focused source like a bare bulb or the sun on a cloudless day. It throws deep, crisp shadows and creates high contrast. This is your go-to when you want to emphasize sharp edges, rugged textures, or a sense of drama.
On the flip side, soft light is diffused and comes from a much larger source, like a window on an overcast day or a softbox. It wraps around your product, softening shadows and creating smooth, even tones. For most e-commerce, this is the gold standard because it shows the product clearly and without any distracting harshness.
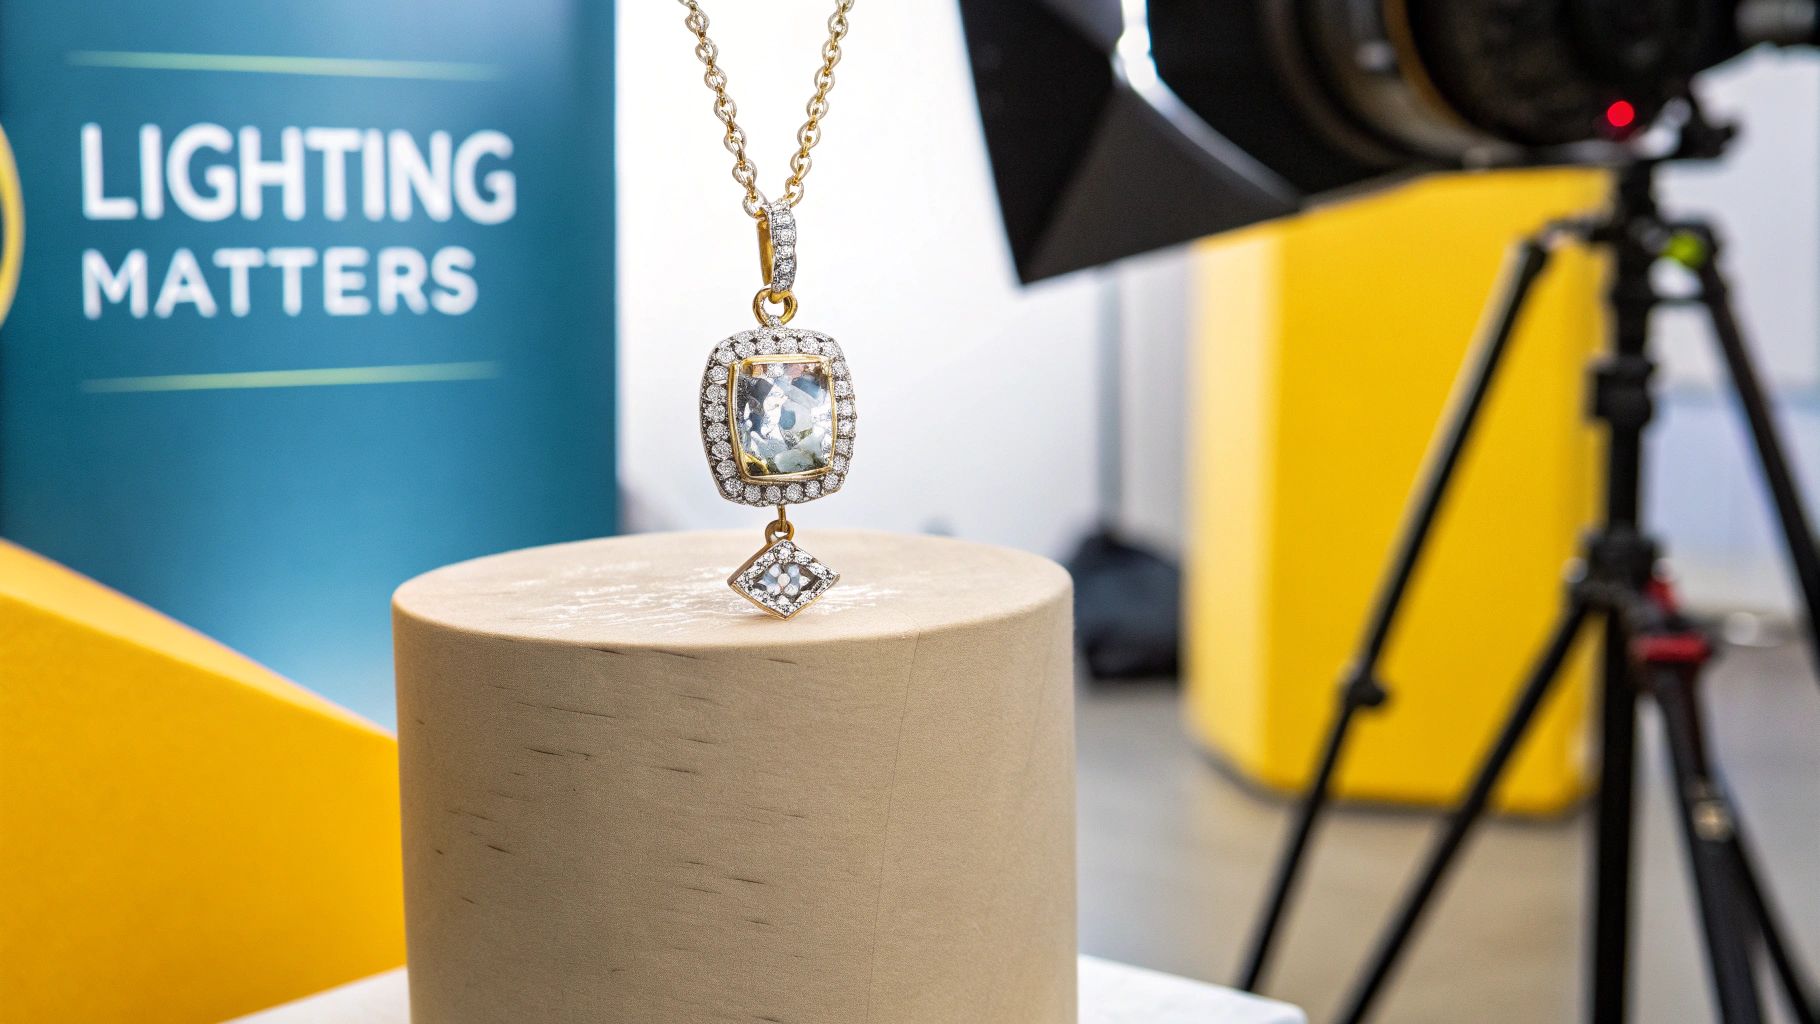
Key Insight: The light you choose directly tells the customer how to feel about the product's texture and quality. Use hard light to make jewelry sparkle or soft light to make a cashmere sweater look unbelievably cozy.
H3: Creating a Simple One-Light Setup
You don't need a truckload of expensive strobes to get stunning results. A single light, used correctly, is often all it takes. The goal here is to replicate the beautiful, directional light from a big window.
First, position your main light (your "key light") at roughly a 45-degree angle to your product. This is the sweet spot for creating natural-looking highlights and shadows that give the item real dimension.
Next, grab a simple white foam board or a reflector and place it on the opposite side of the product. Its only job is to bounce some of the key light back, gently filling in any dark shadows. It’s a cheap trick that adds instant professional polish.
This simple two-piece combo is incredibly versatile. It gives you just enough control to beautifully light almost anything without getting overwhelmed.
H3: Choosing Your Lighting Setup
Deciding between natural light and artificial light can be tough. Natural light is free and beautiful, but artificial light gives you complete control. Here’s a quick breakdown to help you pick the right tool for the job.
| Lighting Type | Best For | Pros | Cons |
|---|---|---|---|
| Natural Light | Food, apparel, lifestyle shots, brands with an organic feel | Free, creates a soft and authentic look, beautiful color rendering | Inconsistent (depends on weather/time of day), limited shooting hours |
| Continuous LED Light | Beginners, video content, anyone who wants to see the light in real-time | What you see is what you get, affordable, good for video and stills | Can be less powerful than strobes, potential for color cast on cheap models |
| Strobe/Flash | E-commerce, high-volume shoots, products needing sharp detail | Extremely powerful and consistent, freezes motion perfectly, total control | Learning curve, more expensive, requires triggers and modifiers |
Ultimately, starting with a simple continuous LED light or a strobe gives you the consistency you need for a professional e-commerce store. Natural light is fantastic for social media and lifestyle content where a more organic feel is part of the brand.
H3: When to Use a Three-Point Lighting System
Once you're comfortable with a single light, you might be ready for the classic three-point lighting setup. This is the standard for commercial work because it gives you absolute control over every aspect of the light.
It's built with three lights, each with a specific job:
- Key Light: This is your main light source, placed at that 45-degree angle.
- Fill Light: Set opposite the key light but with less power, its job is to soften shadows.
- Backlight: Placed behind the product, this light creates separation from the background.
That backlight is the secret sauce. It traces a subtle rim of light around the product's edges, making it "pop" and look truly three-dimensional.
H3: Choosing Backgrounds That Convert
Your background is just as important as your lighting. It sets the scene and helps a customer imagine the product in their own life. For e-commerce, you'll mainly rely on two types: the clean white sweep and the contextual lifestyle background.
The seamless white background is the undisputed king of online retail for a reason. It removes all distractions, putting 100% of the focus on your product. It’s also a requirement for marketplaces like Amazon. This should be your default for the main product listing image.
However, a lifestyle background tells a story. A photo of your ceramic mug on a reclaimed wood table next to a book suddenly has personality. These shots are perfect for showing the product in its natural element on social media, in emails, or on your website's homepage. For brands looking to create tons of these scenes efficiently, you can even explore guides on how to generate realistic AI photos from a single studio shot.
At the end of the day, the effort pays off. High-quality product images can boost conversion rates by up to 27%, and 67% of shoppers say image quality is a "very important" factor in their decision to buy. It's an investment that delivers real returns.
Using Composition and Styling to Tell a Story
 Okay, you’ve nailed the lighting and your background is set. Now for the fun part: arranging the scene. This is where you graduate from simply documenting a product to telling a visual story that actually connects with people and makes them want to buy.
Great composition guides the viewer’s eye exactly where you want it to go. It’s what separates a cluttered, confusing photo from one that feels clean, professional, and honestly, just better. We're not talking about following rigid rules here; it’s about learning the language of visuals to create images that sell.
Harnessing Classic Composition Techniques
Artists have been using certain compositional principles for centuries for one simple reason: they work. Weaving them into your product photography will give your shots an immediate professional polish, even if your viewer can’t quite put their finger on why.
The Rule of Thirds is famous for a reason. Picture your frame with a 3x3 grid over it, like a tic-tac-toe board. Instead of plopping your product smack in the middle, try placing it along one of the lines or at one of the four intersection points. It’s a small shift that makes a huge difference, creating a more dynamic and natural-looking image.
For example, when shooting a bottle of skincare serum, positioning it on the left vertical line leaves some breathing room on the right. The whole shot just feels more balanced and interesting than one with the bottle dead-center.
Pro Tip: Your smartphone and DSLR almost certainly have a gridline feature. Turn it on. It’s the easiest way to apply the Rule of Thirds on the fly and ensure your horizons are always perfectly straight.
Another powerful tool is negative space—that’s just the empty area around your product. Don't be afraid of it! Giving your product plenty of room to breathe makes the entire composition feel more intentional and high-end.
Strategic Styling with Props
Think of props as the supporting cast; your product is the star of the show and should never be upstaged. The best props add context, demonstrate scale, and reinforce your brand's vibe without making the scene feel crowded. The trick is to be deliberate about every single item you place in the frame.
Before adding a prop, ask what purpose it serves.
- To Show Scale: A photo of a wallet by itself is an abstract size. But place it next to a smartphone or a set of keys, and its dimensions become instantly clear.
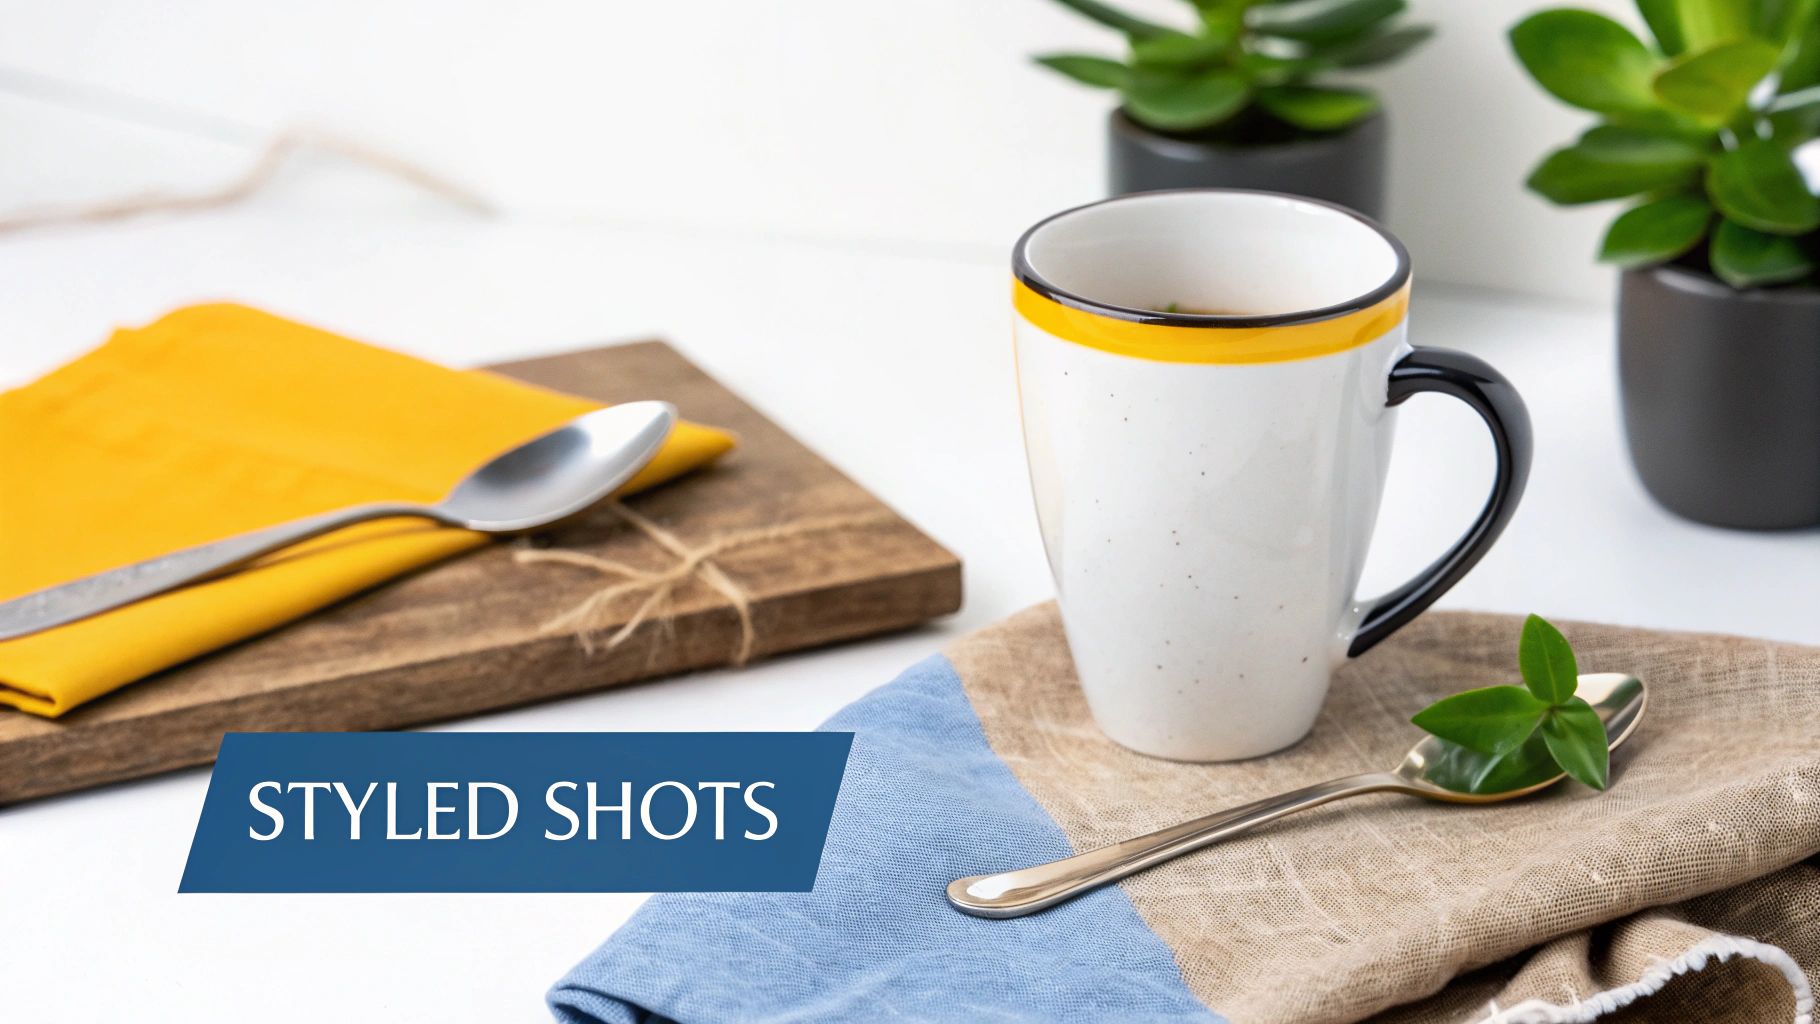
- To Add Context: Selling handmade coffee mugs? Style one on a rustic wooden table with a few coffee beans scattered nearby. Suddenly, you’re not just selling a mug; you’re selling a cozy morning ritual.
- To Reinforce Brand Identity: If you sell natural, organic soap, props like a sprig of fresh lavender or a soft, earth-toned towel do the talking for you, communicating your brand’s values without a single word.
A good rule of thumb is to choose props with a similar color palette and texture to create a cohesive, believable scene. The goal is authenticity, not a cluttered mess.
Essential Shot Types Every Brand Needs
A great product page answers every question a customer might have visually. To pull this off, you need a smart mix of different shot types that work together to tell the full story. For just about any product, a well-rounded shot list will include these.
- The Hero Shot: This is your main image, usually on a clean, white background. The product is the star—perfectly lit, in focus, and with zero distractions. It's the workhorse of your product listings.
- Detailed Macro Shots: Get up close. Show off the fine stitching on a leather bag, the unique texture of a hand-woven blanket, or the intricate facets of a gemstone. These shots scream quality, build trust, and help justify your price.
- In-Context Lifestyle Shots: Put the product to work. Show someone wearing the necklace, the art print hanging on a stylish wall, or the blanket draped over a sofa. This helps customers imagine the product in their own lives, which is a huge step toward making a purchase.
- Scale Shots: As we mentioned, these photos use a familiar object to give a quick, intuitive sense of the product's actual size. This is one of the most effective ways to manage customer expectations and cut down on returns.
By planning to capture these key angles, you’re not just taking pictures; you’re building a complete visual narrative. This variety gives shoppers all the information and confidence they need to click "Add to Cart."
Your Post-Production Workflow for a Polished Look
Getting the shot is only half the battle. Post-production is where a good photo transforms into a great one—a polished, professional asset that’s ready to turn casual browsers into paying customers. This isn't about slapping on heavy filters; it's a careful process of refining and optimizing what you’ve already created.
A consistent editing workflow is what ties your entire store together visually. It builds trust. Think of this final stage as the quality control that elevates every single listing.
The Essential Editing Checklist
Before you start getting creative, every product photo needs a few fundamental adjustments. I like to think of these as the non-negotiables that form the backbone of a professional image. Tackle these first, every single time.
Your initial pass should always focus on these core elements:
- Cropping and Straightening: Your product is the star of the show, so make sure it's framed that way. Use the gridlines in your editing software to get those horizons perfectly level, then crop out any distracting empty space. A good rule of thumb is to have the product fill about 80-90% of the frame.
- White Balance Correction: This one is absolutely critical for color accuracy. If your whites look a little yellow or have a blue tint, then your product’s true color is misrepresented—a surefire way to increase customer returns. The easy fix? Use your software's dropper tool on a neutral white or gray area in the photo to instantly correct the color temperature.
- Exposure and Contrast Adjustments: Here, subtlety is key. Make small tweaks to the brightness and contrast to make your product pop. The goal is to bring it to life without blowing out the highlights (making whites pure white with no detail) or crushing the blacks (losing all the detail in the shadows).
Getting these basics right gives you a clean, accurate foundation to work from.
Subtle Retouching and Cleanup
The camera sees everything. And I mean everything—every tiny speck of dust, every fingerprint, every minor scuff on your product or background. This is where a little bit of subtle retouching works wonders.
Using a spot healing brush or a clone stamp tool, you can seamlessly "paint over" these tiny imperfections. You’re just presenting the best possible version of your product, not an unrealistic one. Resist the urge to over-edit; you don't want your items looking artificial, as that can erode the trust you’re trying to build.
And what about those shots that are almost perfect, except for one distracting object in the background? For those situations, we have a guide on how to use AI to remove objects from photos without needing to be a Photoshop wizard.
Key Takeaway: Edit for accuracy, not for dramatic effect. The best post-production work is invisible, making the product look its absolute best while remaining true to life.
Optimizing Images for the Web
Once your photos are looking perfect, there’s one final, crucial step: optimizing them for your website. A stunning, high-resolution image is useless if it takes ten seconds to load. In fact, it will hurt your business more than it helps. Slow load times are a notorious cause of cart abandonment and can even tank your SEO rankings.
The global photography services market hit $55.6 billion in 2023, and a lot of that growth is driven by tech like 360° photos that are proven to boost conversions. But even these advanced formats need to be optimized. After all, 67% of shoppers say image quality and site performance are key factors in their buying decisions. You can find more insights on photography industry trends on imageretouchinglab.com.
To get that perfect balance between quality and speed, just follow this simple process:
- Resize Your Images: That massive 5000-pixel image from your camera is overkill for a product listing. I find that resizing photos to a maximum width of around 2000 pixels is a great standard for most e-commerce sites.
- Choose the Right File Format: For most product photos, JPEG is still the go-to. However, if you want to be ahead of the curve, modern formats like WebP offer much better compression at a similar quality, meaning even smaller file sizes.
- Compress the File: Finally, run your image through a tool like TinyPNG or use your software’s "Save for Web" feature. Your target should be to get the file size under 150 KB without any noticeable drop in quality.
This last step ensures your beautiful photos contribute to a fast, smooth, and enjoyable shopping experience for your customers.
How AI Can Scale Your Product Photography
Even with a perfectly dialed-in workflow, you eventually hit a wall with traditional product photography. For any brand that's growing, the real challenge isn't just taking one great photo. It's creating a constant stream of high-quality, diverse, and on-brand visuals without breaking the bank. This is where artificial intelligence completely changes the game.
AI tools, like PhotoMaxi, act as a massive force multiplier for your creative efforts. They work by tackling the biggest bottlenecks in content creation head-on: the need for physical studios, paid models, exotic locations, and days-long photoshoots. The concept is refreshingly simple: take one solid product photo and let AI spin it into an entire library of professional shots.
Imagine you have a single, clean shot of a new handbag on a white background. With AI, you can instantly place it on a marble countertop in a Parisian apartment, on a rustic wooden table in a cozy café, or even in the hands of a realistic model strolling through New York City. We're not just talking about swapping backgrounds here; we're talking about generating entirely new, commercially-ready scenes in minutes.
Beyond Backgrounds: Generating People and Places
The real magic of modern AI is its ability to create photorealistic elements from scratch. Need to show your new clothing line on a diverse range of models? Forget about the cost and complexity of booking talent. AI can generate unique, royalty-free models that perfectly match your brand's aesthetic.
This kind of technology puts high-end concepts within reach for everyone.
- Synthetic Models: Create realistic human models wearing your apparel or using your products. You get full control over poses, expressions, and the environment.
- Virtual Try-Ons: Some platforms can integrate with e-commerce sites like Shopify to let customers see how an item might look on different body types, a huge conversion booster.
- Instant Campaign Creation: Generate an entire suite of on-brand content for a social media launch—from Instagram stories to ads—all from a single source image.
This example from PhotoMaxi shows just how powerful this is. A simple starting photo becomes a variety of professional, on-brand images instantly.
Notice how the AI keeps the product perfectly intact while building entirely new contexts around it. You get everything from clean studio shots to rich lifestyle scenes, giving you a full campaign's worth of assets in one go.
Augmenting Creativity, Not Replacing It
There's a common myth that AI is coming for photographers' jobs. It’s much more helpful to think of it as the ultimate creative assistant. It takes over the repetitive, expensive, and technically difficult parts of the process, freeing you up to focus on the big-picture creative vision.
You still need a great initial photo—the AI's output is only as good as the input you give it. Our guide on using AI for photography digs deeper into this partnership between human creativity and machine efficiency.
The market is already embracing these tools. The global e-commerce product photography market is on track to hit US$275.4 million by 2030. A massive driver of this growth is 3D photography, which now accounts for over 65% of the market share. Why? Because it offers interactive 360-degree views that build shopper confidence and dramatically cut down on returns. You can discover more about these product photography stats on electroiq.com.
The Big Picture: AI isn't just an editing tool; it's a creation platform. It empowers you to produce more high-quality, revenue-driving content faster and more affordably than ever before. For a growing e-commerce brand, that’s not just an advantage—it's a necessity.
Common Product Photography Questions
Even with the best plan, you're bound to run into questions when you're figuring out how to take better product photos. Below, I’ve pulled together some of the most common ones we hear from brands that are scaling up. These are the straightforward, practical answers you need to get past those common hurdles and start shooting with more confidence.
This isn't about getting bogged down in theory. It’s about solving the real-world problems that pop up every day. Nailing these fundamentals will fix a huge number of the issues you might be facing.
Can I Really Take Good Product Photos With Just My Smartphone?
You absolutely can. Modern smartphone cameras are shockingly powerful, and for many products, they’re all you need to get professional-looking results. The secret isn't the device itself—it's how you use it. Your technique is what makes all the difference.
First and foremost, master your lighting. It’s your most important tool. Try shooting near a large window to get that soft, beautiful natural light that makes products look fantastic. To get those razor-sharp images, a simple tripod is a must. It completely eliminates the blur from shaky hands and is non-negotiable for crisp shots.
From there, dig into the features your phone already has built-in.
- Turn on the gridlines: This simple overlay is a game-changer for applying basic composition principles like the Rule of Thirds.
- Explore 'Pro' or 'Portrait' mode: These settings usually give you more control over things like focus and exposure, which helps make your product the star of the show.
- Lock your focus and exposure: Before you shoot, just tap and hold on your product on the screen. This locks the focus and brightness so the camera doesn't keep trying to readjust while you're composing the shot.
Pair these techniques with a decent editing app, and your phone becomes a powerhouse capable of producing images ready for any online store.
What Is the Single Most Important Element for Better Product Photos?
If you can only focus on one thing, make it your lighting. Period. Great lighting is the bedrock of every great product photo. It carves out the shape of your product, shows off its texture, sets the mood, and ultimately communicates its real value to the customer.
A well-lit photo from a smartphone will beat a poorly-lit shot from a top-of-the-line DSLR every single time. Bad lighting creates a cascade of problems—digital noise, off-brand colors, and harsh, distracting shadows that are a nightmare to fix later. Getting the light right from the start is the biggest lever you can pull for an immediate jump in quality.
My Personal Advice: Before you spend a single dollar on new gear, invest your time in learning to control natural light. A simple white foam board from a craft store, used as a reflector to bounce light into the shadows, will do more for your photos than a brand-new lens.
How Many Photos Should I Include for Each Product?
Your main goal is to visually answer every single question a potential customer might have. A great starting point is to aim for 4-6 high-quality images for every product listing.
This lineup should give a complete picture and build the trust needed to make a purchase. A solid image set usually includes:
- The "hero" shot: A clean, crisp, perfectly clear image of the product, usually on a simple background.
- Shots from all key angles: Show the front, back, and sides. Give them a full 360-degree understanding of the item.
- A detailed close-up: Zoom right in to highlight texture, quality materials, or unique details.
- An in-context or lifestyle shot: Show the product being used. This demonstrates its scale and helps customers visualize it in their own lives.
For products with more complex features or lots of variations, don't be afraid to add more. The whole point is to remove any and all uncertainty, making the customer feel confident enough to hit that "Add to Cart" button.
How Can AI Tools Help If I'm Not a Professional Photographer?
AI tools like PhotoMaxi are designed to level the playing field. They automate the most difficult, expensive, and time-consuming parts of product photography, taking things like physical studios, models, and complex lighting setups out of the equation.
Instead of wrangling a massive photoshoot, you can just upload one good, clean photo of your product. From there, the AI can generate countless variations. It can place your item into any scene you can imagine, create realistic models wearing your clothing, and produce entire social media campaigns in minutes, not weeks.
For entrepreneurs and creators, this means saving a ton of time and money. But more importantly, it unlocks a level of quality and consistency that used to be impossible without a professional team, letting you go toe-to-toe with much bigger brands.
Ready to create stunning, on-brand product visuals without the hassle of a traditional photoshoot? See how PhotoMaxi can transform a single photo into an entire campaign. Generate your first AI-powered product shots with PhotoMaxi today!
Related Articles


Ready to Create Amazing AI Photos?
Join thousands of creators using PhotoMaxi to generate stunning AI-powered images and videos.
Get Started Free